Crop vest and cutoffs
 This is a really easy project, it should only take a few hours and the effect is a very cute outfit for hot weather.
You will need:
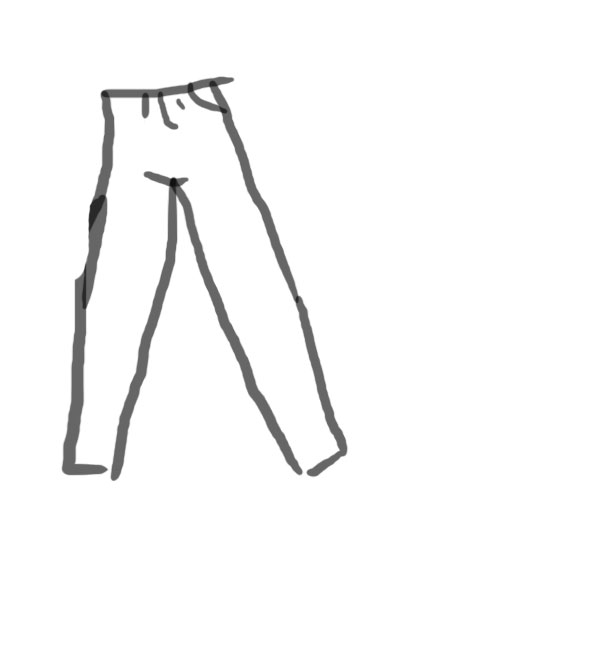
First, find an old pair of jeans, or a new pair you don't mind tearing to pieces.
A china marker, chalk, or whatever you like to mark fabric with
Scissors
A sewing machine
A rotary mat and cutter are not strictly necessary, but will make cutting the vest out so much easier.
The Shorts

Step One
Decide where you're going to cut the legs off. I cut mine off pretty high, but you don't need to do it that way. You will want at least half of the thigh to make the vest out of.
Step Two
Mark on one leg where you want your shorts to end. You only need to do this on one leg for now. I put on the pants and marked where I wanted them to end with a china marker. It helped me visualize just how short they were going to be. You'll want to mark the front and the back of the leg for this. It may only mean the difference of one inch from the front to the back, but it's an inch you'll want, especially if the shorts are short enough that underbutt is an issue.
Add about half an inch for adjustment when the legs are off and you realize despite my anal instructions on how to cut the legs evenly and your attention to detail, they still aren't even.

Step Three
Cut off the leg you've marked.
Step Four
Fold the pants over, front sides touching, and mark the cutting line for back of the pants. If your shorts are the same in front and back, you can skip step five.
Fold the pants over, front sides touching, and mark the cutting line for back of the pants. If your shorts are the same in front and back, you can skip step five.

Step Five
Fold the pants over the other way, so the back pockets are touching, and mark the cutting line to make both legs match.
Step Six
Cut the other leg off.
The Vest

If you already have a vest you like the cut of, you can use that as a pattern. That's what I did.
If you do not have a vest to base the new one off of, you'll have to make a pattern and that's a pain in the ass.
Step One
If you have a vest you can use as a pattern, skip to step five. Remember the seam allowance.
Step Two
To size the vest to yourself, measure yourself around the widest part of your torso. This will be your breasts if you're a woman. If you're not a woman, you're going to look fabulous in your vest and booty shorts. Divide this chest measurement into four.
This number is now X. Don't tell me you've forgotten Algebra already.

Step Three
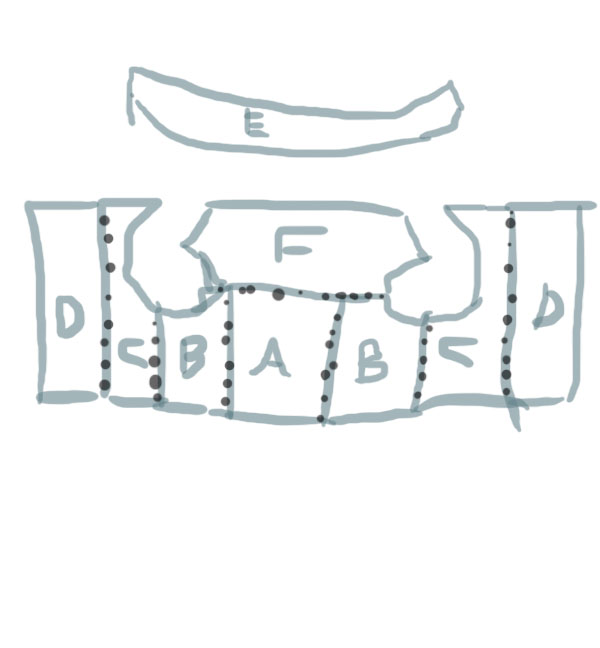
Lay out the shapes in the above diagram. E should be cut last and made out of the scraps.
Put as many bottom hems as you can fit on the hem from the pants legs. You'll want to start with D, then do C, then B, then A, because you're more likely to see the hem in front. Unless, of course, the hem of the jeans is torn up and not worth looking at anymore, in which case cut it off.
A-Cut one
B- Cut two, facing opposite directions
C- Cut two, facing opposite directions
D- Cut Two
E- Cut one, unless you feel a deep need to face the collar
F- Cut one
A- Back
B- Back Side
C-Front Side
D- Front
E- Collar
F- Back shoulder
Step Four
Lay the shapes seen in the pattern out on your fabric. If you lay the front sections out with the centers along the seam in the center of the fabric, it will look neat and tailored and make fitting your chest easier.
Step Five
Pin the pieces together like in the diagram. The collar isn't attached yet, but I thought you'd appreciate knowing you still needed it.
Remember to pin it together inside out.

Step Six
Sew all that up.
Step Seven
Hem the collar.
Step Eight
Sew the shoulders together.

 Step NineFold the collar and the vest in half to find their centers, then pin the center to the center. There will be vest left over in the front, that's going to become your lapel.
Sew that up.
Step Ten
Fold over the lapels and hem to taste.
Step Eleven (optional)
Put a pair of darts in the front, under the breasts to make the cut more feminine. This can be done by putting the vest on, folding in the fabric under the breasts and pinning it in place. Then replace the pins with stitches.
You can add buttons or a zipper if you like, I put safety pins in the lapels to keep them flat. And because it looked cool.
No comments:
Post a Comment